NeuronWriter turns a target keyword into a guided SEO workspace for SERP analysis, competitor selection, content briefs, NLP terms, entities, drafting, and optimization. This NeuronWriter tutorial follows a practical nine-step workflow for creating a new US-English article, from project setup through WordPress publishing QA, while keeping human research and editorial judgment in control.
| At-a-glance | Details |
|---|---|
| Tool | Try NeuronWriter ↗ |
| Tutorial outcome | Build, optimize, and prepare one SEO article for publication |
| Core workflow | Project → Query → Competitors → Outline → Draft → NLP optimization → CMS QA |
| Best for | SEO specialists, writers, agencies, content teams, SMBs, and website owners |
| Market used in this guide | United States, English |
| Skill level | Beginner to intermediate |
Use this guide when you already have a primary keyword and need a repeatable production process. The workflow explains where NeuronWriter provides data and where the editor still needs to make the decision. If you are evaluating product fit, pricing, and limitations before starting, read the NeuronWriter review for the broader product context.
Quick Answer: How Do You Use NeuronWriter?
Use NeuronWriter by creating a project, running a query for one target keyword, selecting intent-matched competitors, building an outline, drafting in the Content Editor, improving relevant NLP terms and entities, and completing publishing QA in your CMS. The score is a diagnostic signal, not a publishing decision.
A reliable workflow has nine stages:
| Step | Action | Required output |
|---|---|---|
| 1 | Create or select a project | Site-specific workspace and audience context |
| 2 | Run a New Content query | US-English analysis for the primary keyword |
| 3 | Select SERP competitors | Intent-matched comparison set |
| 4 | Build the content brief and outline | Original H1, H2, and H3 plan |
| 5 | Draft in the Content Editor | Complete answer-first article |
| 6 | Improve NLP terms, entities, and score | Relevant topical coverage without stuffing |
| 7 | Use AI and fact extraction selectively | Verified draft support, not unreviewed copy |
| 8 | Add links, metadata, and editorial proof | Publication-ready content package |
| 9 | Export to WordPress and run QA | Published page with correct formatting and SEO fields |
What Is NeuronWriter Used For?
NeuronWriter is used to plan, write, optimize, and refresh search-focused content. It combines Google SERP analysis, competitor structures, NLP suggestions, entity recommendations, a content score, AI-assisted drafting, internal-link support, and integrations such as WordPress and Google Search Console.
The platform should sit inside a larger editorial system. Keyword prioritization, topical mapping, first-hand evidence, product testing, source verification, brand positioning, conversion design, and final CMS checks remain separate responsibilities. NeuronWriter can show that competing pages discuss an entity, but it cannot decide whether that entity supports your article's central intent.
For a tutorial, the useful mental model is:
- SERP data establishes the expected context.
- The outline turns that context into a logical teaching sequence.
- The editor adds information gain, evidence, and audience-specific decisions.
- The score checks coverage before publishing.
What Should You Prepare Before Creating a Query?
Prepare the keyword, country, language, page type, audience, conversion goal, and publishing destination before opening a new analysis. These inputs prevent NeuronWriter from becoming a generic writing session.
| Requirement | Recommended choice | Why it matters |
|---|---|---|
| Primary keyword | One canonical query | Keeps competitor and NLP analysis focused |
| Country | United States | Matches the target search market |
| Language | English | Controls the SERP set and term recommendations |
| Page type | Guide or tutorial | Determines the expected structure and depth |
| Audience | Named user groups and experience level | Changes examples, terminology, and decisions |
| Conversion goal | Trial, product evaluation, or next-step education | Prevents premature sales copy |
| CMS | WordPress or your actual platform | Defines the final formatting and metadata checks |
| Evidence standard | Official sources plus human verification | Reduces unsupported AI-generated claims |
Write a one-sentence page promise before the query. For this article, the promise is: “A reader can move from an empty NeuronWriter project to a publication-ready tutorial using a controlled nine-step workflow.” Every section should support that promise.
Step 1: Set Up a NeuronWriter Project
Create one project for the website, brand, or client whose content you are optimizing. Projects organize queries, writers, content plans, deadlines, integrations, and site context.
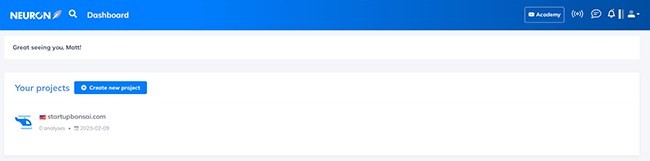
Use a separate project for each website when practical. A shared agency account can contain many projects, but unrelated sites should not share the same audience profile, internal-link context, WordPress connection, or editorial assumptions.
Before creating the first query, review Project Settings and record:
- the primary domain;
- target audience and market;
- preferred tone and brand voice;
- team members and permissions;
- WordPress or Google Search Console connections, if used;
- a naming convention for queries.
For agencies, use a query name that identifies the client, topic, and intent. For an SMB, the site and page type may be enough. Consistent naming matters once the project contains dozens of active and completed analyses.
Step 2: Create a New Query for the Target Keyword
Select New Query, choose New Content, enter the primary keyword, and set English plus the United States as the language and country. NeuronWriter then processes ranking pages and prepares the competitor, NLP, entity, question, and content-score recommendations.
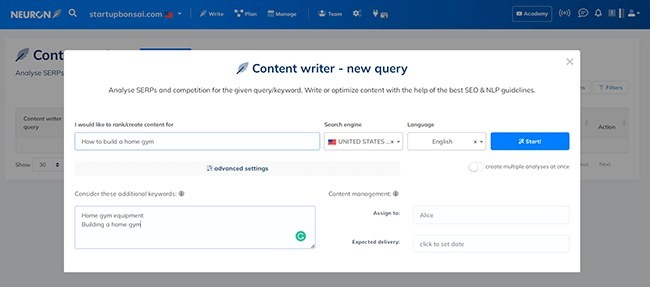
The official New Query documentation provides two main analysis paths:
- New Content analyzes a keyword for a new article.
- Optimize Content imports an existing URL so you can refresh a published page.
Advanced Settings can include custom URLs, additional keywords, a persona, and task options. Add custom URLs only when they are genuinely useful references. Adding a product homepage or official document can enrich research, but it should not replace the intent-matched SERP set.
Avoid entering a long list of loosely related keywords. Additional keywords should describe the same page intent, such as “how to use NeuronWriter,” “NeuronWriter content score,” and “NeuronWriter content editor.” A separate intent should receive a separate page and query.
Step 3: Select the Right SERP Competitors
Choose competitors that answer the same search intent and use a similar page format. This decision shapes NeuronWriter's recommended terms, entities, headings, questions, and target length.
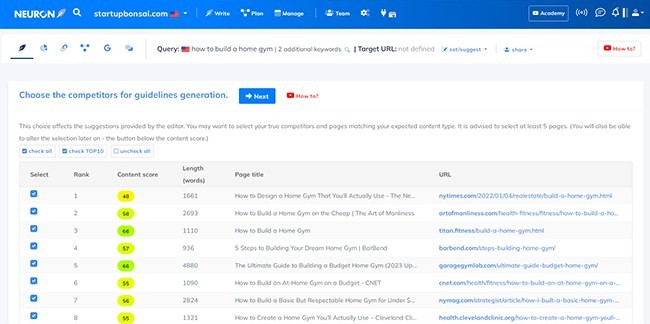
For a tutorial query, prefer:
- step-by-step guides;
- product documentation;
- detailed workflow articles;
- pages that demonstrate the current interface;
- pages written for a similar knowledge level.
Deselect pages with a different job. A pricing page, login screen, video-only result, thin coupon page, or general AI-writing listicle may rank for a related phrase while producing poor tutorial recommendations.
Do not assume a business competitor is a content competitor. The correct comparison set is the group of pages that currently satisfies the searcher. If the selected pages have mixed intent, reduce the set before writing. A smaller, coherent set is more useful than a larger set that combines tutorials, reviews, and sales pages.
Step 4: Build the Content Brief and Search-Intent Outline
Turn the SERP findings into an original outline that teaches the task in the order a user performs it. Do not copy the most common competitor heading sequence.
NeuronWriter's current Content Designer opens from the AI Writing area in the Content Editor. Its Content Brief step can include the meta title, meta description, page type, content requirements, target audience, tone of voice, length, and other enrichment options.
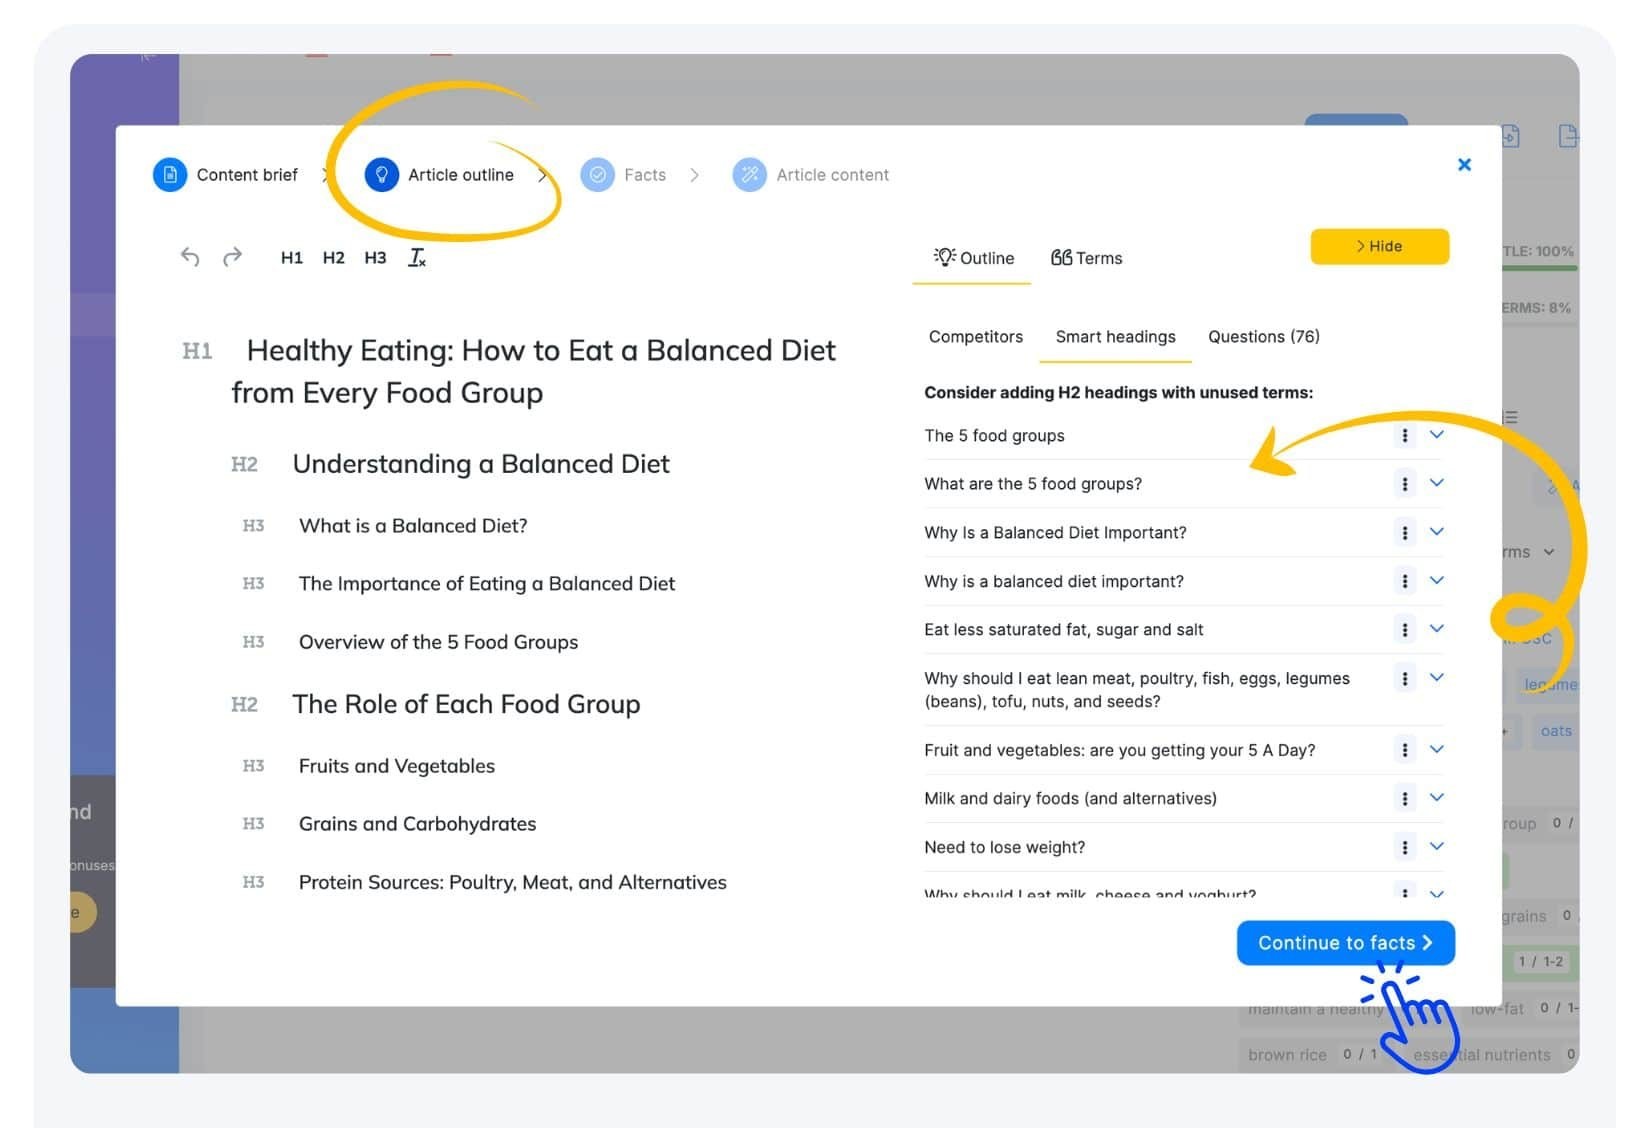
In the Article Outline step, review four inputs separately:
- Smart headings reveal unused terms that may deserve a section.
- Competition exposes how selected pages structure the subject.
- Questions surface direct informational needs.
- Terms show concepts that may belong in headings.
Keep a heading only when it advances the tutorial. A phrase can be statistically common and still be unnecessary. Each H2 should imply a clear question, and the first sentence below it should answer that question immediately.
For information gain, add sections competitors often omit: competitor-selection criteria, score misuse, audience-specific workflows, WordPress security, and a final publishing checklist.
Step 5: Write the Draft in the Content Editor
Draft the complete answer before optimizing individual terms. The Content Editor keeps the text, headings, score, suggested terms, entities, questions, outline, and AI tools in one working view.
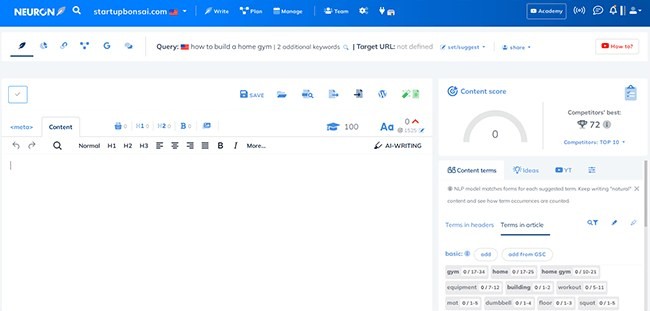
Use an answer-first drafting pattern:
- open each section with a direct answer;
- explain the action and its purpose;
- add a concrete example or decision rule;
- state a limitation or failure condition where relevant;
- move to the next dependent step.
Do not interrupt the first draft every time the score changes. Constant score-checking fragments the reasoning and encourages sentence-level term insertion before the article has a stable structure. Complete the core workflow first, then run a dedicated optimization pass.
Writers should also preserve source notes outside the editor or in a research file. The final article needs traceable facts even when AI assists with phrasing.
Step 6: Optimize NLP Terms, Entities, and Content Score
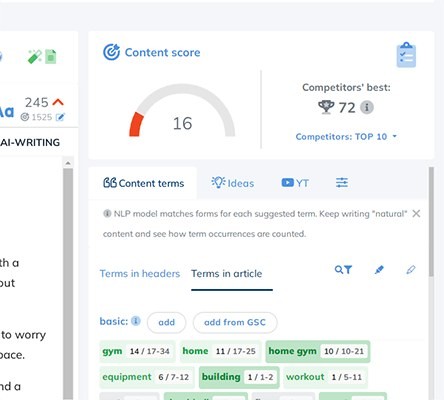
Use the optimization panel to identify missing context, then add only terms and entities that improve the explanation. NeuronWriter derives its suggestions from the selected competitors and semantic analysis, so recommendation quality depends on Step 3.
NLP means natural language processing. In this workflow, NLP recommendations represent words and phrases found across strong competing pages, while entity suggestions identify the people, products, platforms, places, and concepts that help search systems interpret the subject.
| Optimization signal | Correct use | Misuse to avoid |
|---|---|---|
| Content score | Compare coverage with the selected SERP set | Treating 100 as a publishing requirement |
| NLP terms | Add relevant concepts where they clarify meaning | Repeating awkward exact-match phrases |
| Entities | Identify people, products, platforms, and concepts | Adding named entities without a relationship |
| Heading terms | Improve structural coverage | Rewriting every heading for the score |
| Questions | Resolve useful follow-up intent | Expanding the FAQ with irrelevant questions |
| Word count | Detect an obvious depth gap | Padding sections to reach a number |
A good term insertion creates a factual relationship. Instead of adding “content optimization” to an unrelated sentence, explain that the Content Score compares the draft's coverage with the selected competitor set. The entity, attribute, and value now support the reader's understanding.
Aim to reach a competitive range, then stop when further changes reduce clarity. The correct endpoint is a complete, accurate article that reads naturally and covers the job, not the maximum available score.
Step 7: Use Content Designer and AI Writing Selectively
Use AI for bounded drafting tasks, not for unsupervised publication. NeuronWriter can generate outlines, sections, rewrites, FAQs, and long-form content, but every output still needs source, fact, and brand review.
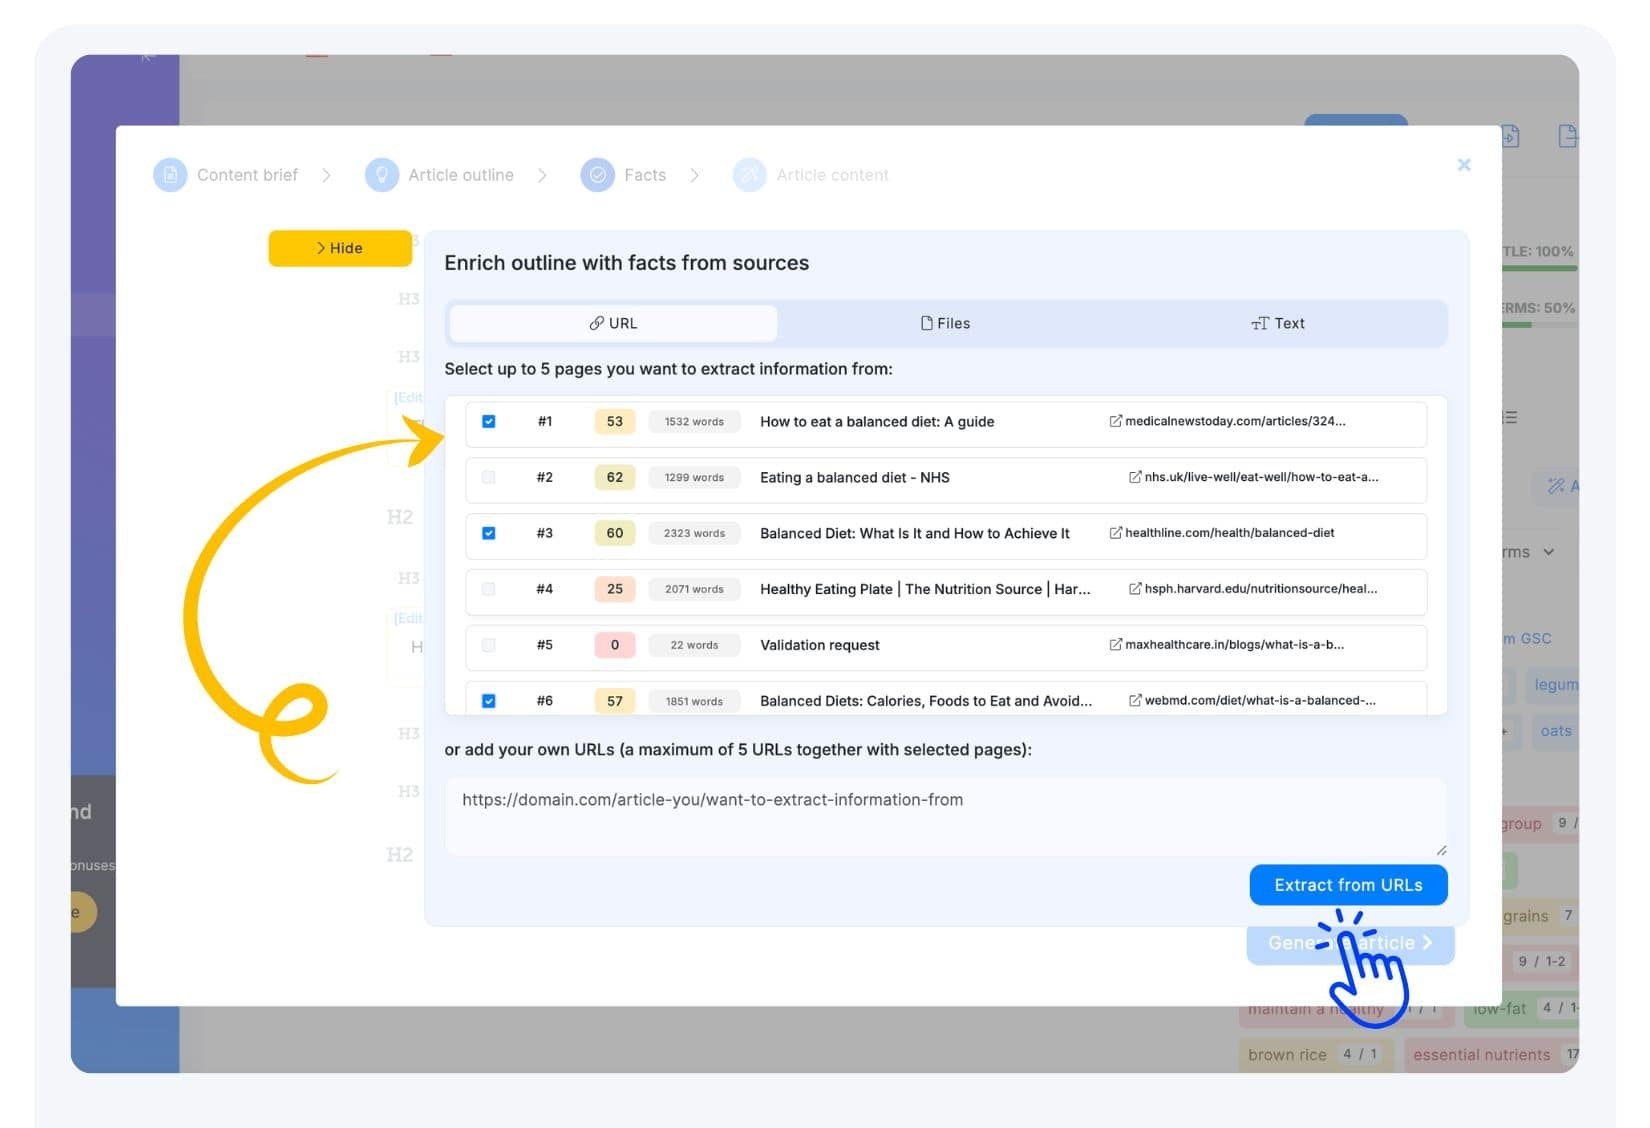
The current Content Designer workflow moves through Content Brief, Article Outline, Facts, and Article Content. In the Facts step, users can select competitor pages or provide URLs, files, or text. The official help page states that each fact-extraction iteration costs 500 AI credits, so select sources deliberately rather than repeating the process without a research plan.
Use AI safely by assigning one clear task at a time:
- turn verified notes into a first paragraph;
- summarize a known source without changing its meaning;
- produce alternative headings;
- simplify a technical explanation;
- convert a checklist into parallel grammar;
- identify unanswered questions for human review.
Reject generic benefits, unsupported numbers, invented experience, fabricated quotes, and claims that cannot be traced to a source. Teams that need a broader brand-copy workflow can compare NeuronWriter vs Jasper, while teams prioritizing high-volume generative features may find the NeuronWriter vs Writesonic comparison more relevant.
Step 8: Add Internal Links, Metadata, and Editorial Proof
Complete the article's semantic and editorial layer after the core draft is useful. NeuronWriter can suggest internal links and metadata terms, but the editor should determine which page relationship serves the reader.
Use internal links for explicit relationships:
- connect a tutorial to its product pillar once;
- link to a comparison when a workflow trade-off appears;
- link to alternatives when NeuronWriter may not fit;
- avoid linking to every cluster page from one paragraph;
- never link the article to itself.
Then verify the title, meta description, H1, opening answer, section sequence, image captions, source claims, and CTA placement. The title and description should promise the same outcome the article delivers.
For editorial proof, add information competitors cannot produce automatically: real calculations, tested settings, screenshots, operating constraints, audience-specific decisions, and clear stop conditions. This is the layer that separates an optimized article from a rewritten SERP summary.
Step 9: Export to WordPress and Run Publishing QA
Export or copy the finished draft into WordPress, then treat WordPress as a separate quality-control stage. NeuronWriter's official documentation says the WordPress integration is available on Gold and higher plans.
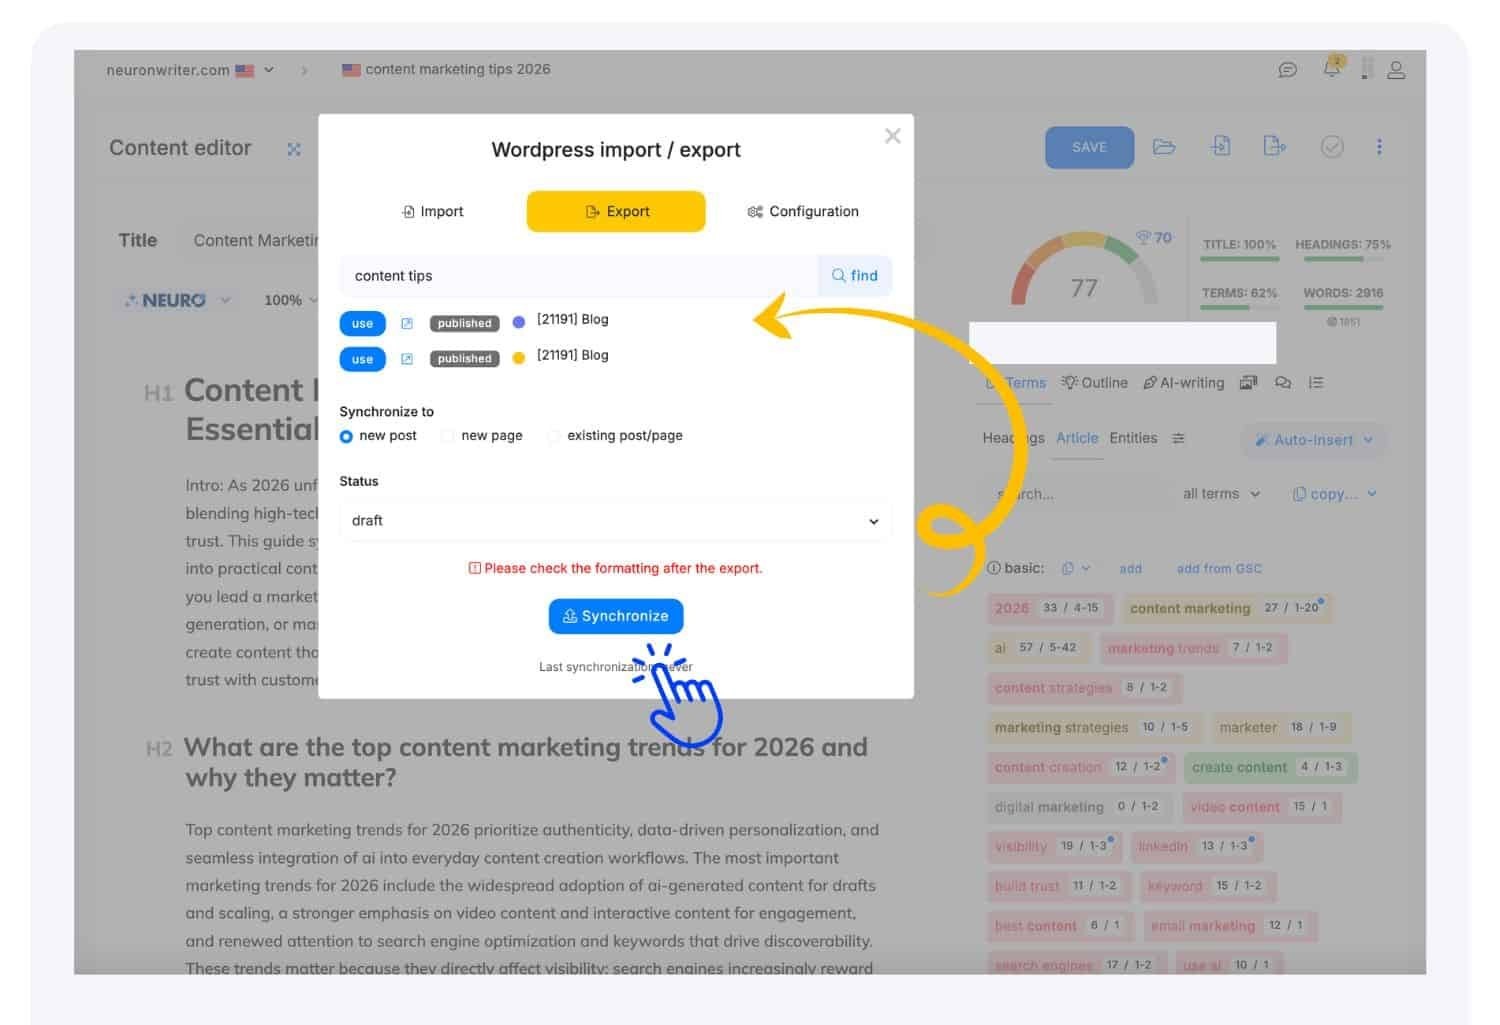
The current setup uses Project Settings, a WordPress username, and a WordPress Application Password. The WordPress user must have the Author role or higher. After configuration, Import and Export options appear near Save in the editor's top bar.
Use an Application Password rather than the user's normal account password. Limit the connected account's permissions, use HTTPS on production, store the credential securely, and revoke it when the integration is no longer needed.
After export, check:
| WordPress QA item | Pass condition |
|---|---|
| Heading structure | One H1 and a logical H2/H3 hierarchy |
| Tables | Responsive and accessible, without broken columns |
| Images | Local files, useful ALT text, captions, and correct dimensions |
| Links | Correct internal targets and affiliate attributes |
| Rank Math | Title, description, focus keyword, canonical, and social image set |
| Schema | Matches the actual article type |
| Mobile layout | No overflow, clipped text, or unusable CTA |
| Final preview | Light and dark modes remain readable when the theme supports both |
If the tutorial workflow fits your production process, test the current NeuronWriter subscription route before making a longer commitment.
How Should Each Audience Adapt This Workflow?
Keep the nine steps, but change the inputs, approval points, and success metrics for the operating context. A freelancer and an agency can use the same editor while needing different controls.
| Audience | Workflow emphasis | Useful success signal |
|---|---|---|
| SEO specialists and marketers | Intent, competitor quality, entities, links, refresh data | Coverage improves without weakening conversion intent |
| Copywriters and content creators | Brief clarity, natural language, source notes, human editing | Draft meets the brief with fewer revision cycles |
| Agencies and content teams | Project separation, assignments, templates, approvals, CMS permissions | Repeatable delivery across clients without access leakage |
| SMBs and website owners | One keyword, one article, simple QA checklist, cost control | Published content answers a real customer search need |
Automation-heavy teams should compare the controlled editor workflow with the broader production approach in NeuronWriter vs AIContentfy. The right system depends on whether the bottleneck is optimization judgment or volume automation.
How Do You Refresh Existing Content in NeuronWriter?
Choose Optimize Content in New Query, provide the existing URL, and review the imported page against the current SERP context. A refresh is not a command to add every newly suggested term.
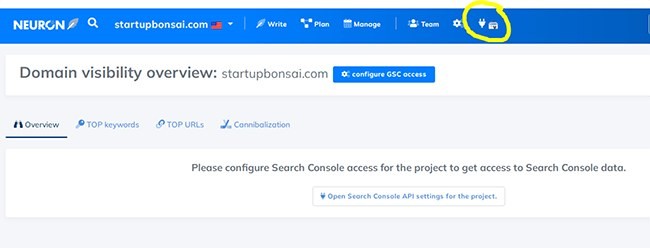
Prioritize pages with impressions, ranking movement, conversions, outdated facts, or clear content gaps. Google Search Console data can help identify pages that merit attention. For each refresh:
- confirm that search intent has not changed;
- inspect the current competitor set;
- update facts, screenshots, and product details;
- repair weak or outdated sections;
- improve internal links;
- revise metadata only when the search promise changes;
- preserve valuable content instead of rewriting the page blindly;
- publish and monitor the result.
Track the before and after state. Record the update date, major edits, score, selected competitors, and performance window. Without that record, the team cannot separate a useful refresh from normal ranking volatility.
What NeuronWriter Mistakes Should You Avoid?
Avoid treating recommendations as commands. Most workflow failures begin with a poor competitor set, mixed intent, or unreviewed AI output.
| Mistake | Why it hurts | Better approach |
|---|---|---|
| Selecting mismatched competitors | Distorts terms, outline, score, and target length | Choose pages with the same intent and format |
| Chasing a perfect score | Produces repetitive or unnatural language | Stop in a competitive range when coverage is complete |
| Copying competitor headings | Creates a derivative structure | Build a task-based sequence and add information gain |
| Publishing AI output unchanged | Risks factual and stylistic errors | Verify sources and edit every generated section |
| Mixing several intents | Weakens the central page promise | Create separate queries and URLs |
| Skipping WordPress QA | Leaves broken tables, media, links, or metadata | Preview the final CMS output before publishing |
| Buying lifetime before validation | Commits before the workflow proves useful | Test real assignments first |
When Should You Compare NeuronWriter Alternatives?
Compare alternatives when the workflow mismatch is structural, not when one score or draft is disappointing. NeuronWriter is optimization-centered; another tool may fit better when your priority is brand-first writing, autonomous production, or a lower-complexity interface.
Start with the broader NeuronWriter alternatives list. For narrower decisions, compare NeuronWriter vs WordHero when AI writing value is central, or NeuronWriter vs Writecream when a compact multi-format writing toolkit is the main requirement.
Do not switch tools because the first query produces noisy recommendations. Recheck the keyword, market, language, intent, and competitor selection first. Change platforms when the repeated operating needs do not match the product's strengths.
Is the NeuronWriter Workflow Worth Using?
The workflow is worth using when you publish or refresh search-focused content often enough to benefit from repeatable SERP analysis and optimization QA. It is especially useful for teams that want one workspace connecting query analysis, outlines, drafts, terms, entities, AI assistance, and CMS handoff.
It is not a complete SEO system. Technical SEO, backlinks, brand authority, original research, conversion strategy, and editorial accountability remain outside the score. Use NeuronWriter as an optimization layer inside that larger system.
Validate the tool with several real assignments before comparing payment models. NeuronWriter's official site currently promotes a seven-day trial without requiring a credit card. If the workflow remains useful after repeated use, review the current NeuronWriter lifetime route against your actual monthly volume and required plan features.
FAQ
Is NeuronWriter good for beginners?
Yes, NeuronWriter is accessible to beginners who start with one project, one keyword, and one article. Beginners should focus on intent and competitor selection before trying advanced AI, integration, or automation features.
How do you create a query in NeuronWriter?
Open a project, select New Query, choose New Content or Optimize Content, enter the keyword, and set the language and country. Advanced Settings can add custom URLs, additional keywords, persona details, and task options.
What content score should you aim for?
Aim for a competitive score relative to the coherent competitor set you selected, not a universal number. Stop when the article covers the task naturally and further term insertion would reduce clarity.
Should you select every ranking competitor?
No. Select only pages that match the article's search intent and format. Deselect thin pages, sales pages, homepages, and mixed-intent results that would distort the recommendations.
Can NeuronWriter write a complete article?
Yes, Content Designer and AI Writing can generate long-form content, but the result still requires human verification and editing. Check facts, sources, examples, links, tone, and unsupported claims before publishing.
Does NeuronWriter integrate with WordPress?
Yes. NeuronWriter states that WordPress integration is available on Gold and higher plans. The connection uses a WordPress username and Application Password, and Import/Export controls appear in the editor after configuration.
Can you use NeuronWriter to optimize an existing article?
Yes. Choose Optimize Content when creating the query and provide the published URL. Review the imported content against current intent and competitors, then make controlled updates instead of replacing the page automatically.
What is the best next step after this tutorial?
Run one US-English query for a real article and complete all nine steps. Record the competitor set, score, editing time, CMS issues, and post-publication result before deciding whether to scale the workflow.